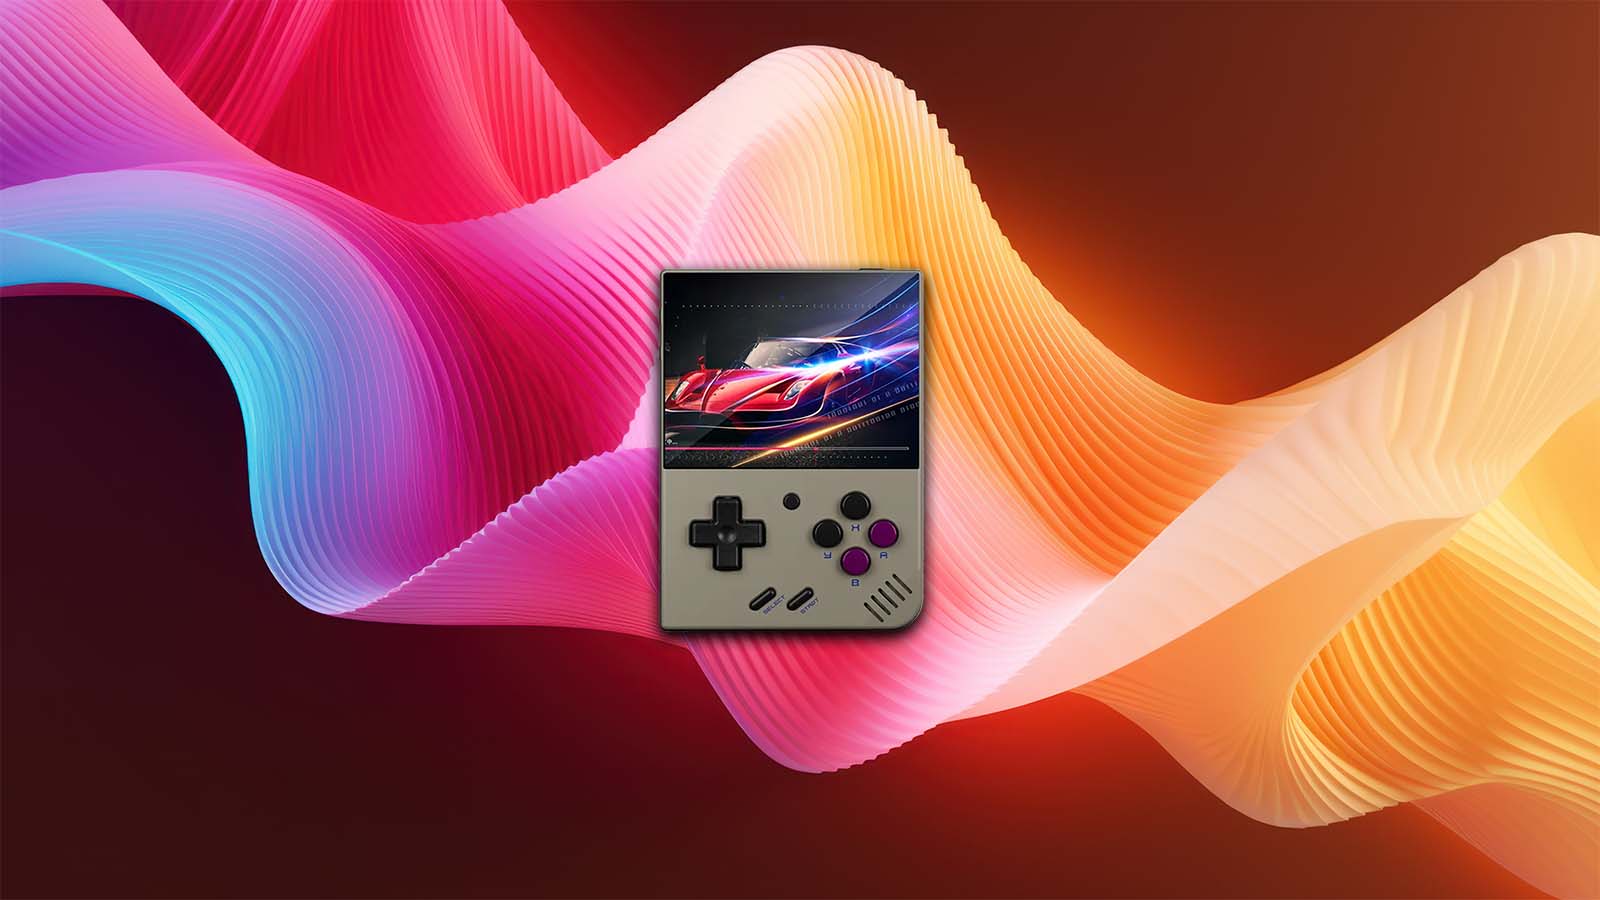
Small, sleek, and shockingly capable — the Miyoo Mini Plus has quickly earned a cult following among retro gaming fans. This palm-sized powerhouse can emulate everything from NES classics to PlayStation legends, all while fitting neatly into your pocket. But as simple as it looks, getting it properly set up can feel intimidating at first — especially if you’re new to OnionOS or SD card formatting.
This step-by-step walkthrough will take you from zero to fully operational. We’ll cover everything — from prepping your SD card and installing OnionOS to adding ROMs, scraping artwork, and customizing your setup. By the end, your Miyoo Mini Plus will be running smoother than ever, ready to deliver that perfect dose of pixel nostalgia anytime, anywhere.
What Games Can the Miyoo Mini Plus Play?
One of the biggest questions newcomers have when picking up the Miyoo Mini Plus is simple — what can it actually play? Despite its small size and modest specs, this little handheld punches well above its weight when it comes to retro gaming.
| System Category | Runs Very Well (Top Tier) | Can Run / Variable Performance | Generally Unsupported / Poor Performance |
|---|---|---|---|
| 8‑bit/Early Consoles | NES/Famicom, Game Boy, Game Boy Color | — | — |
| 16‑bit Era | SNES/Super Famicom, Sega Genesis / Mega Drive, Sega Master System | Sega 32X (some titles), TurboGrafx-CD (some games) | — |
| Handheld/Portable | Game Boy Advance (GBA), Game Gear, Wonderswan | Neo Geo Pocket, Atari Lynx (may need tweaking) | — |
| PlayStation Era/Early 3D | PlayStation 1 (PS1) — most games run smoothly | Large PS1 titles, multi-disc games, some CD-audio heavy games may stutter | — |
| Arcade/CD-based Systems | Older arcade boards (CPS1, CPS2), some Neo Geo games | MAME cores for heavier arcade boards, Sega CD (may require tuning) | N64, Dreamcast, Sega Saturn, 3DO — essentially unplayable |
| Other Systems | TurboGrafx-16/PC Engine, Master System add-ons | Some experimental emulators (MSX, ColecoVision) | Modern 3D systems, PSP, PS2, GameCube — too demanding |
Let’s start with the good news: the Miyoo Mini Plus absolutely dominates the 8-bit, 16-bit, and early 32-bit eras. Everything from NES and SNES to Game Boy, Game Boy Advance, and Genesis/Mega Drive runs flawlessly. The device’s crisp 3.5-inch IPS display makes pixel art pop — and OnionOS makes loading up games quick and painless.
Of course, there are limits. The Miyoo Mini Plus’s hardware simply isn’t built for heavy 3D emulation. That means systems like the Nintendo 64, Dreamcast, and Sega Saturn are beyond its reach. Some lighter PSP games might technically boot, but performance won’t be worth the frustration.
Miyoo Mini Plus vs. Anbernic RG35XX H
How does the Miyoo Mini Plus really stack up against other budget emulation devices? Let’s break down how it compares to its closest rival, the Anbernic RG35XX H.
| Feature | Miyoo Mini Plus | Anbernic RG35XX H |
|---|---|---|
| Display | 3.5″ IPS, 640×480 | 3.5″ IPS, 640×480 |
| Processor | ARM Cortex-A7 dual-core (~1.2 GHz) | Allwinner H700 quad-core (~1.5 GHz) |
| RAM | 128 MB | 1 GB LPDDR4 |
| Storage | Single microSD slot | Dual microSD slots |
| Connectivity | Wi-Fi | Wi-Fi, Bluetooth, HDMI-out |
| Battery Life | 5–6 hours (3000 mAh) | 7–8 hours (3300 mAh) |
| OS Options | OnionOS | GarlicOS / muOS |
| Best For | Retro purists, plug-and-play ease | Power users, broader system range |
The Mini Plus delivers an unbeatable balance of form factor, performance, and charm. With OnionOS powering its sleek menus and lightning-fast boot times, it’s perfect for 8-bit and 16-bit gaming — think NES, SNES, Genesis, and PlayStation 1. Its crisp 3.5-inch IPS display and pocketable size make it one of the most travel-friendly retro consoles on the market.
The RG35XX H, meanwhile, feels like its brawnier cousin. It’s slightly larger, with more hand-friendly grips and a sturdy matte finish. The same 3.5-inch screen size is here, but the body’s extra room allows for a beefier battery, dual microSD slots, and even optional HDMI-out for big-screen play.
Preparation: Getting Your Gear Ready
Before diving in, grab these essentials:
- A branded 128GB (or larger) microSD card
- A branded SD card reader for your PC
- Your ROM and BIOS library
Do yourself a huge favor and toss out the included SD card. They’re unbranded, unreliable, and prone to early failure. Countless users have lost game saves and entire setups because of these low-quality cards. The ROMs that come preloaded on the included card? A mixed bag at best — and often incompatible with some emulators.
The Miyoo Mini Plus only has one SD card slot, so you’ll want to make the most of it. A 128GB branded SD card from a trusted brand is the sweet spot. It gives you plenty of room for large libraries — including PlayStation, Sega CD, and other heavy hitters — without the slowdowns or crashes you’d get from off-brand cards.
You will also need to have clean ROMs from verified dumps. If you want a simple, ready-to-go option, look up the Tiny Best Set online; it’s a curated pack that’s pre-sorted for OnionOS. Each folder is already labeled and structured correctly, so you can simply drag, drop, and go when the time comes.
Pro Tip: The Tiny Best Set even comes with optional artwork packs. While OnionOS can scrape art automatically, having it preloaded can save you hours if you’re building a big library.
Software Setup: Prepping Your SD Card
Now that you’ve got your branded SD card and reader ready, it’s time to prep the software. You’ll only need one tool here — Rufus. Head to the official Rufus website and download the portable version. This lightweight tool will let you format your SD card as FAT32 — something Windows doesn’t do natively for cards over 32GB. Using Rufus avoids a ton of headaches later on.
Formatting Your SD Card as FAT32 (Step-by-Step)
- Plug your SD card into the reader and connect it to your PC.
- Open Rufus. Under Device, make sure your SD card is selected — double-check the storage size so you don’t accidentally wipe another drive.
- For Boot Selection, choose Non bootable.
- Change the File System to FAT32 and give the Volume Label any name you want — something simple like “MIYOO128.”
- Hit Start, confirm the warnings about partitions and data, and let Rufus do its thing.
It’ll only take a few moments, and once it’s done, your SD card will be perfectly formatted and ready for OnionOS.
Handling the Autorun Files (and Why to Delete Them)
When you open your freshly formatted SD card, Windows Defender might throw up a false warning about autorun files. Don’t panic — these are just leftover metadata files from Windows’ volume setup. Simply delete any “autorun” files you see in the card’s root directory. You won’t need them, and it’s best to keep your SD card clean before loading in OnionOS.
Now your card is fully prepped, formatted, and ready for the fun part — installing your new operating system.
Installing OnionOS – The Brain Behind Your Handheld
With your SD card freshly formatted, it’s time to bring your Miyoo Mini Plus to life. Head over to the official OnionOS GitHub page — that’s where the community maintains the latest builds. Scroll to the Releases section and look for the newest post. Under Assets, you’ll find a file named something like Onion-vX.X.X.zip. Download that file to your computer — it’s your new operating system.
Extracting & Organizing the Files Properly
Once the download finishes, move or cut-and-paste the ZIP file directly onto your SD card. Right-click it and extract the contents right there — not in a subfolder. After extraction, you should see seven folders at the root of your SD card:
- .tmp_update
- BIOS
- Media
- miyoo
- miyoo354
- RetroArch
- Themes
If you don’t see all seven, make sure your file explorer is set to show hidden files. Once everything looks correct, delete the ZIP file to save space and eject the SD card safely.
Booting Up for the First Time
Now comes the exciting part. Pop the SD card into your powered-off Miyoo Mini Plus, then turn it on. The device will automatically begin setting up OnionOS — you’ll see a loading screen, a friendly “thank you” message, and a little heart before landing on the main menu.
Take a moment here. You’ve just installed OnionOS — the beating heart of the Miyoo Mini Plus. From here on out, everything gets easier and way more fun.
First Start-Up: Setting Up Your Environment
Once OnionOS finishes its initial boot-up, you’ll be greeted with a verification screen asking which emulators you’d like to install. This step is crucial — it determines which folders and configurations OnionOS creates for your ROMs later. Go through the list and select the systems you actually plan to play. Don’t worry if you’re unsure — you can always add or remove emulators later using the built-in package manager.
Must-Have Apps for Everyday Use
After emulators, OnionOS will prompt you to choose optional apps. These add extra functionality to your device — and a few are absolute must-haves for smooth operation:
- File Explorer: Helps you navigate and manage files directly on your handheld.
- FTP Server: Allows you to transfer games and files wirelessly over your network.
- GameSwitcher: Quickly swap between recent games without rebooting.
- HTTP File Server: Access files through your browser — perfect for quick uploads.
- Onion OTA Update: Lets you update OnionOS directly from the device.
- Random Game: Great for indecisive nights when you just want to play something.
You can skip unnecessary apps for now and experiment later — OnionOS makes it easy to add them back in.
Installing and Rebooting – The Moment of Truth
Once you’ve made your selections, press Start to review your setup summary. Press Start again to confirm, and OnionOS will install everything automatically. You’ll see progress bars as it finalizes configurations and creates system folders.
When it’s done, the Miyoo Mini Plus will reboot — and this time, you’ll land right on your shiny new home screen, complete with a clean interface and your selected systems ready to go.
Congratulations — you’ve officially set up OnionOS! Now it’s time to fill your handheld with games and get that nostalgic library rolling.
Adding ROMs & BIOS Files
Now that your Miyoo Mini Plus is fully initialized, it’s time for the fun part — loading up your games. Start by powering off the device and carefully removing your SD card. Plug it back into your computer using your SD card reader.
If you grabbed the Tiny Best Set earlier, this part’s a breeze. All of the folders are already structured for OnionOS compatibility — just open the ZIP and drag the system folders (like GB, GBA, PS, etc.) into the Roms directory on your SD card.
Here’s the key rule: inside each platform folder, you should see the game files directly — not more subfolders. For example:
📁Roms/GBA/

     🎮 Metroid Fusion.gba

     🎮 Dragon Ball Advanced Adventure.gba
If you open a system folder and see another layer of folders, drag the ROMs up one level. OnionOS expects a clean file structure to detect your games properly.
Adding BIOS Files (and Why They Matter)
Certain emulators (like PlayStation, Sega CD, and Neo Geo CD) need BIOS files to function. These small but vital files tell the emulator how to properly boot and run the games.
To install them, simply copy all your BIOS files into the BIOS folder located at the root of your SD card — no subfolders needed. For example:
📁BIOS/

   📂 SCPH1001.bin

   📂 bios_CD_U.bin

   📂 neogeo.zip
Keep things simple and organized. A PlayStation BIOS, for instance, should sit directly in the BIOS folder — not inside a PS1 or Sony subfolder.
Avoiding Common Pitfalls
- Wrong folder names: Make sure folder names match what OnionOS expects (case-sensitive in some cases).
- Hidden extensions: Double-check that your games end in .gba, .bin, .zip, or whatever format your emulator supports.
- Incomplete transfers: Always eject the SD card safely — corrupt files can cause boot issues or missing games.
Once everything’s copied and neatly organized, safely eject your SD card and slide it back into your Miyoo Mini Plus. You’re just one quick refresh away from seeing your full library in all its retro glory.
Refreshing Game Lists
You’ve added your ROMs and BIOS files, but… nothing’s appearing on your Miyoo Mini Plus? Don’t panic — this is completely normal. OnionOS doesn’t automatically update your game library every time you add new files. Instead, you’ll need to manually refresh your ROM list to rebuild the cache and make your new games visible.
Here’s how to do it:
- From the main menu, navigate to the Games tab.
- Press the Select button on your device.
- Choose Refresh All ROMs from the menu that appears.
- Press A to confirm and wait a few seconds while OnionOS rescans your folders.
Once it’s done, your new games should appear neatly organized under their respective systems.
Fixing Detection Issues Fast
If some titles still don’t show up after refreshing, double-check the following:
- Folder names: Make sure your system folders (like GBA, SNES, PS) are properly capitalized and match OnionOS standards.
- ROM formats: Some emulators only support specific file types (for example, .chd for PlayStation or .zip for Neo Geo). Unsupported files simply won’t appear.
- Folder depth: Ensure your games aren’t buried inside multiple subfolders — OnionOS reads one folder level deep within the Roms directory.
Once you’ve confirmed all that, repeat the refresh process again. In most cases, your full library will appear instantly.
Your Miyoo Mini Plus should now be showing off your games exactly as intended — ready for you to launch, play, and relive some classic memories.
Adding Artwork & Scraping Metadata
A plain text list of titles works fine — but let’s be honest, half the fun of retro handhelds is seeing those colorful box arts and game logos pop up on screen. Thankfully, OnionOS makes it surprisingly easy to give your Miyoo Mini Plus a little visual flair. With artwork and metadata, your handheld’s menus go from basic to beautiful.
Option 1: Use Onion Scraper (Built-In)
The easiest method is built right into OnionOS. Here’s how:
- Make sure your Miyoo Mini Plus is connected to Wi-Fi.
- From the main menu, navigate to Tools → Scraper.
- Select Scrape All ROMs (or just pick a single system).
- Choose your preferred artwork source — ScreenScraper and TheGamesDB are both great options.
- Let Onion do its thing — it’ll automatically grab box art, game titles, genres, release years, and more.
Once finished, head back to your game list — each title should now feature slick thumbnails and metadata details that make browsing a lot more immersive.
Option 2: Manual Artwork Import (Offline Users)
If you prefer staying offline or want more control, you can add your own images manually:
- On your computer, locate the folder for your system (e.g., Roms/GBA/).
- Inside, create a subfolder named Imgs.
- Place your artwork in that folder, ensuring each file’s name exactly matches its corresponding ROM filename (for example, MetroidFusion.zip → MetroidFusion.png).
Once done, safely eject your SD card, insert it back into the Miyoo Mini Plus, and refresh your ROM list — your custom art will appear instantly.
Bonus Tip: Try using 2D box art or cartridge-style images for a cohesive look. Some community packs on sites like Reddit or Discord even include full artwork sets optimized for OnionOS.
Your Miyoo Mini Plus is now not just functional — it’s personal. Scrolling through your library should feel like flipping through a mini museum of gaming history, complete with every cover and logo that made these classics iconic.
Customization: Themes & Personal Touches
One of the best things about the Miyoo Mini Plus — besides its adorable size — is just how customizable it is. With OnionOS, you’re not locked into a single look or layout. You can change the theme, adjust system colors, tweak menus, and even alter button behavior to make your handheld truly yours. Think of it as giving your pocket console a personality that matches your own.
Changing Themes
To start, OnionOS includes several preloaded themes you can switch between instantly:
- Head to Settings → Themes.
- Use the D-pad to scroll through the available styles — from minimalist monochrome to colorful retro palettes.
- Select one and press A to apply.
- Reboot your device for the theme to fully take effect.
You can also download custom themes from the Onion community. Sites like Discord, Reddit’s r/MiyooMini, and OnionOS Wiki often host new designs — including dynamic themes that change icons, colors, and fonts all at once. Just drop them into your /Themes folder on the SD card and select them in the same menu.
Custom Boot Logos & Sounds
Want to go a step further? Swap out the boot logo or startup jingle:
- Replace the boot logo by adding a .png file named boot.png in /misc/boot/.
- Customize startup sounds by dropping your .wav file into /misc/sounds/boot/.
Pro Tip: Keep the files small to ensure smooth loading.
Tweaking Behavior & Controls
OnionOS lets you fine-tune how your Miyoo Mini Plus behaves:
- Auto-save states: Turn them on for seamless pick-up-and-play sessions.
- Button shortcuts: Change hotkey combos for things like brightness or quick-save.
- Per-core settings: Adjust emulation options like frame skip, aspect ratio, and filter preferences.
If you like showing off, try enabling animated transitions or dynamic wallpapers through the OnionOS Extras menu. They add flair without sacrificing performance.
Power Button & Menu Controls
The Miyoo Mini Plus might look like a toy at first glance, but its controls are surprisingly thoughtful — especially once you understand the shortcuts baked into OnionOS. The power button and menu combo keys are the heart of the handheld’s usability, letting you quickly sleep, save, or navigate without ever touching a menu screen. Let’s break it down.
Power Button Functions
The Power button isn’t just for turning the system on and off — it manages sleep, safety, and shutdown:
- Quick Press: Puts the console into sleep mode. This suspends gameplay and dramatically saves battery life. Tap it again to instantly wake up right where you left off.
- Long Press (3–5 seconds): Opens the shutdown prompt, letting you power off safely. Always use this method instead of removing the battery or cutting power abruptly — it prevents SD card corruption.
- Force Restart: If the system ever freezes (rare, but it happens), hold Power + Menu together for about 8 seconds to hard reboot.
Menu Button Shortcuts
The Menu button (located beside the D-pad) is your gateway to OnionOS’s real power. It lets you access system settings, quick saves, and emulator options in seconds.
Inside a game, press Menu to open the Quick Menu, which includes:
- Save/Load State: Instantly capture or restore your game progress.
- Exit Game: Return to the main menu.
- Settings: Adjust filters, aspect ratios, scaling, and more.
- Reboot Core: Useful if an emulator crashes or misbehaves.
Combo Shortcuts
Once you’ve played around for a bit, these combos will become second nature:
| Shortcut | Function |
| Menu + Power | Force restart the device |
| Menu + Start | Return to the Onion main menu |
| Menu + Select | Quick access to system options |
| Menu + A | Create a quick save |
| Menu + B | Load your last quick save |
| Menu + R1/L1 | Adjust brightness (if enabled) |
(Note: Some combos may vary slightly depending on your OnionOS version.)
Pro Tip: Never yank the battery or power off mid-save — always exit your emulator and choose Shutdown System from the main menu. It keeps your data, SD card, and OnionOS environment healthy for the long run.
FAQ: Common Questions & Power Tips
You’ve got your Miyoo Mini Plus set up, the games are loaded, and OnionOS is running smoothly — but a few quirks might still pop up. Don’t worry. These are the most common questions (and solutions) that every new user runs into after setting up their handheld. Consider this your quick troubleshooting companion.
Do I really need BIOS files?
For many systems, yes — especially PlayStation, Sega CD, and Neo Geo. Without BIOS files, some emulators won’t boot or will run poorly. You can find a list of required BIOS filenames in the BIOS folder readme that comes with OnionOS.
How long does the battery last?
Expect around 5–6 hours of playtime on a full charge, depending on brightness and the system you’re emulating. 8-bit games sip power, while PS1 emulation drains it faster. Want to extend life? Lower the brightness and use sleep mode instead of shutting down between short sessions.
My device feels warm after long sessions — is that normal?
Completely. The Miyoo Mini Plus runs a small ARM processor that can get mildly warm under sustained load, especially with 3D systems like PlayStation. As long as it’s not uncomfortably hot to touch, you’re fine.
Can I safely remove the SD card while the device is on?
No — always shut down fully before ejecting it. Removing the SD card mid-use can corrupt your OnionOS installation or ROMs.
How do I change my wallpaper or theme?
Go to Settings → Themes and select one of the built-in options, or add new ones by dropping theme folders into /Themes on your SD card. Reboot to apply changes.
Is it better to sleep or fully power off?
Use sleep mode for short breaks — it’s instant and safe. For longer periods (overnight or more), always perform a proper shutdown to preserve battery and SD health.
What’s the best way to back up my setup?
Create a full backup of your SD card by copying its contents to your computer. That way, if your card ever fails, you can restore everything instantly. It’s smart to back up after installing OnionOS and again after setting up your library.
Final Wrap-Up
You’ve done it. From prepping your SD card to installing OnionOS, adding ROMs, and personalizing every pixel, you’ve transformed a tiny handheld into a full-fledged retro gaming powerhouse. What was once a bit intimidating is now second nature — you can boot, play, sleep, and tweak like a pro.
The Miyoo Mini Plus isn’t just another emulator box; it’s nostalgia made portable. A tribute to the golden eras of 8-bit, 16-bit, and beyond — now condensed into something that fits in your pocket. Whether you’re reliving Mega Man X, speedrunning Super Metroid, or just vibing to the PlayStation startup chime, you’ve built a device that’s entirely your own.
A Few Last Words of Wisdom:
- Back up your SD card every now and then — it’s worth the few minutes.
- Keep OnionOS updated; the community constantly adds new features.
- And above all, have fun experimenting. The best part of owning a Miyoo Mini Plus is discovering what it can really do.
Now go ahead — boot it up, load your favorite classic, and let that pixel magic take over. Your portable retro adventure starts now.

