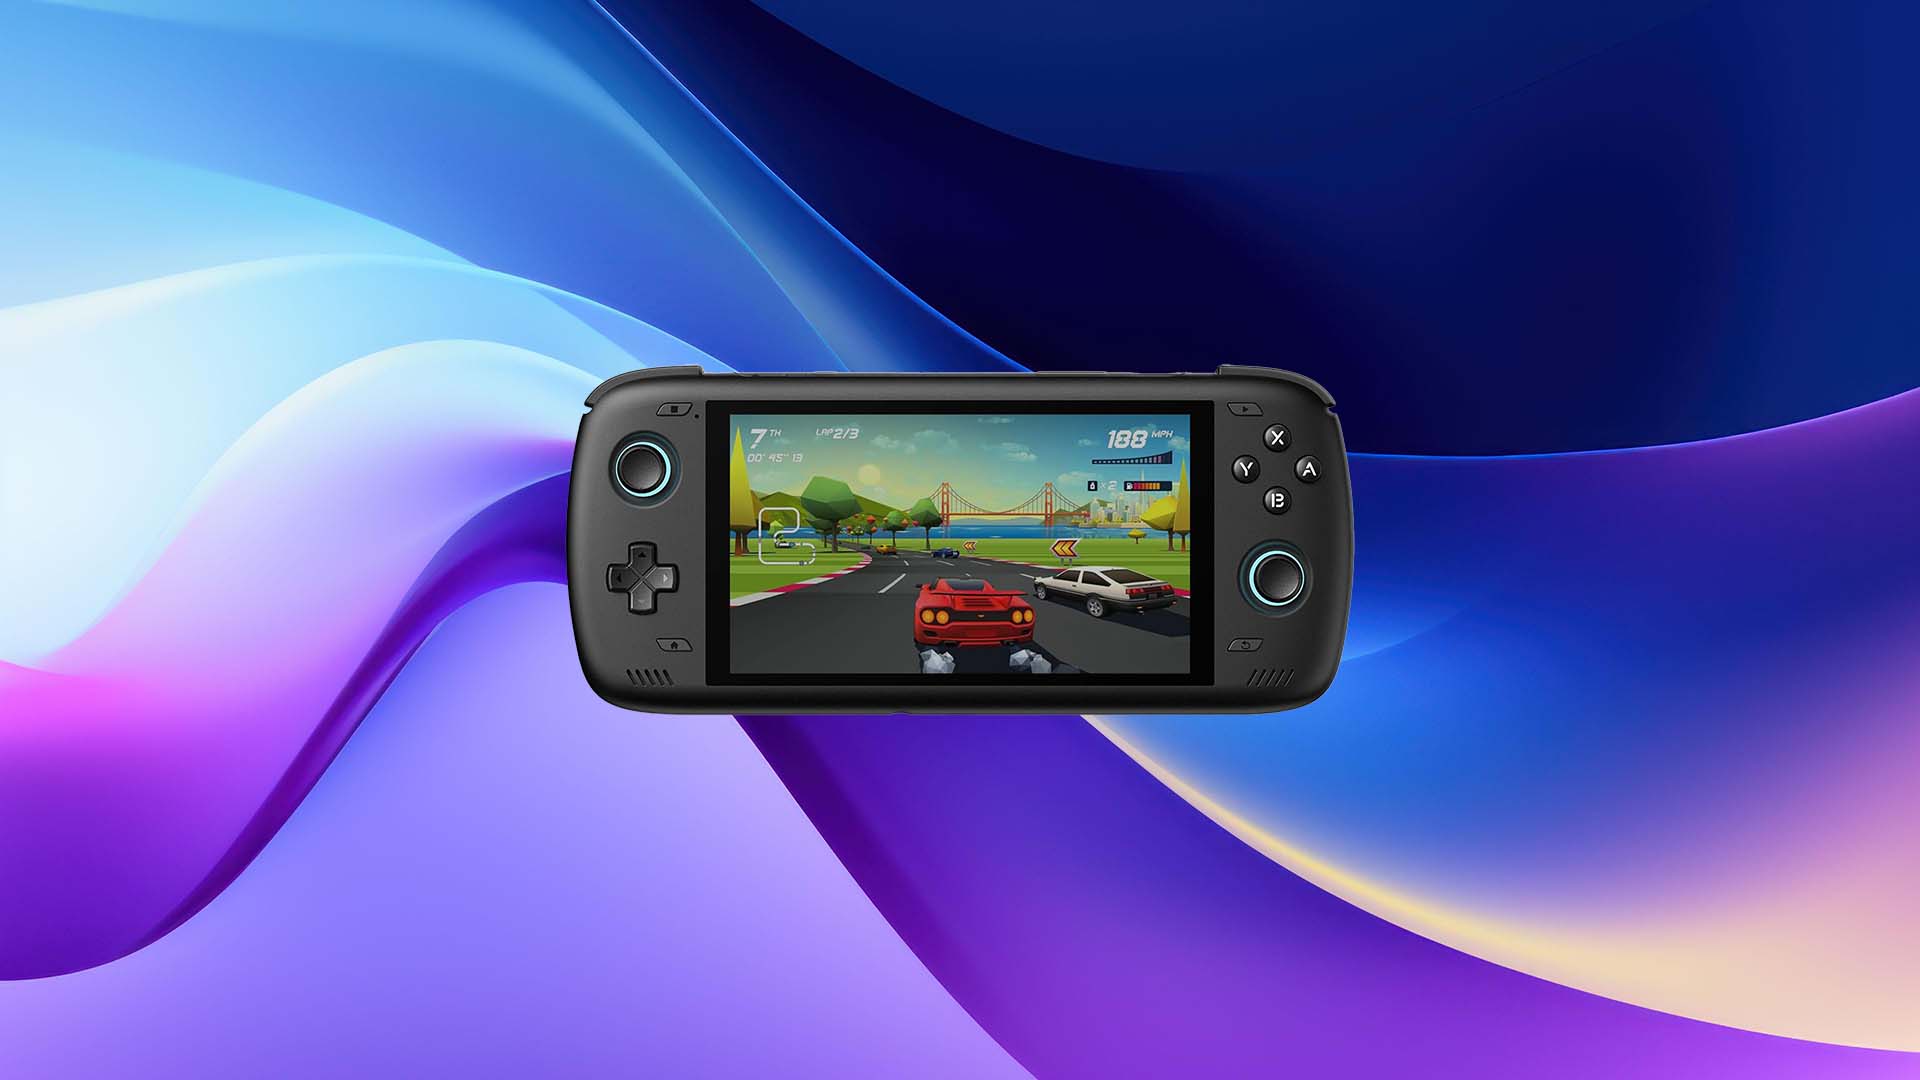
Looking for the ultimate way to play retro games, emulate classic consoles, and stream modern titles on the go? The AYN Odin 2 is hands-down one of the most powerful Android handheld gaming devices on the market right now.
Built for serious retro gaming fans and emulator enthusiasts, the Odin 2 can handle everything from NES and SNES classics to PlayStation 2, GameCube, and even Nintendo Switch emulation. Whether you’re a seasoned gamer or just starting out, this guide will help you get the most out of your new Odin 2 — from unboxing to advanced setup tips.
Know Your Odin 2 – Specs Breakdown
Before diving into setup, emulation, or game streaming, let’s get familiar with the hardware that powers the AYN Odin 2. Whether you’re rocking the Base, Pro, or Max variant — or opting for the Mini or Portal — you’re getting a handheld console that rivals some full-size gaming PCs in raw efficiency.
Each model is built around the Qualcomm Snapdragon 8 Gen 2, one of the fastest mobile chipsets available today, paired with the Adreno 740 GPU for top-tier performance in emulators, Android games, and cloud streaming platforms like GeForce Now or Xbox Game Pass.
AYN Odin 2 – Base / Pro / Max Specs
| Feature | Details |
| CPU | Qualcomm Snapdragon 8 Gen 2 |
| GPU | Adreno 740 |
| RAM | 8GB / 12GB / 16GB |
| Storage | 128GB / 256GB / 512GB |
| Display | 6″ IPS LCD, 1080p touchscreen |
| Battery | 8000mAh |
| Operating System | Android 13 |
| Video Output | HDMI + DisplayPort |
| Connectivity | Wi-Fi 7 + Bluetooth 5.3 |
Perfect for gamers who want the most immersive experience, the standard Odin 2’s large screen and high-capacity battery make it ideal for long gaming sessions and emulation of even demanding systems like PS2 and Nintendo Switch.
AYN Odin 2 Mini – Base / Pro Specs
| Feature | Details |
| CPU | Qualcomm Snapdragon 8 Gen 2 |
| GPU | Adreno 740 |
| RAM | 8GB / 12GB |
| Storage | 128GB / 256GB |
| Display | 5″ Mini-LED, 1080p touchscreen |
| Battery | 5000mAh |
| Operating System | Android 13 |
| Video Output | DisplayPort (up to 4K 60fps) |
| Connectivity | Wi-Fi 7 + Bluetooth 5.3 |
Don’t let the smaller footprint fool you — the Odin 2 Mini delivers full-fat emulation and Android performance in a pocket-friendly size. It’s the go-to choice for portability without compromise.
AYN Odin 2 Portal – Base / Pro / Max Specs
| Feature | Details |
| CPU | Qualcomm Snapdragon 8 Gen 2 |
| GPU | Adreno 740 |
| RAM | 8GB / 12GB / 16GB |
| Storage | 128GB / 256GB / 512GB |
| Display | 6″ IPS LCD, 1080p touchscreen |
| Battery | 8000mAh |
| Operating System | Android 13 |
| Video Output | HDMI + DisplayPort |
| Connectivity | Wi-Fi 7 + Bluetooth 5.3 |
| Bonus Feature | Switch-style detachable controls |
The Odin 2 Portal takes everything you love about the standard model and adds modularity. With detachable controllers, it offers a Nintendo Switch-style experience for couch play, docking, or on-the-go.
What Games Can the AYN Odin 2 Run?
The AYN Odin 2 isn’t just a looker—it’s a portable beast that can chew through generations of gaming history. Whether you’re into 8-bit nostalgia, disc-based classics, or modern handhelds, the Odin 2’s Snapdragon 8 Gen 2 chip and Adreno 740 GPU offer emulation muscle you typically only find on high-end Android phones.
Here’s the breakdown of what consoles and platforms the Odin 2 can handle—and just how well they run.
System-by-System Breakdown
| System | Performance | Notes |
| NES / GB / GBC | Perfect | 8-bit charm, zero issues |
| SNES | Excellent | FX games mostly fine |
| GBA | Perfect | Fully playable |
| Genesis / SMS | Excellent | Great speed and color |
| Saturn | Good | Playable, with some tinkering |
| PS1 | Flawless | Full-speed, enhanced visuals |
| Neo Geo / CPS | Flawless | Arcade ready |
| PSP | Flawless | Full-speed, enhanced visuals |
| Dreamcast | Excellent | Fully playable |
| N64 / DS | Good | Great with tuning |
| PS2 | Good | Playable, with some tinkering |
| GameCube | Very Good | Demanding games need tweaks |
| Wii | Very Good | Demanding games need tweaks |
| PS Vita | Decent | Lighter games playable |
| PS3 | Experimental | Only lightweight 2D games |
| Switch | Decent | Lighter games playable |
First Boot – What To Do Right Out of the Box
Unboxing your AYN Odin 2, Mini, or Portal is exciting—but before launching into emulation and cloud streaming, follow these essential first-boot steps to make sure your device is running at its best.
Initial Setup Checklist
- Power on the device
- Press and hold the power button to boot up your Odin 2.
- Complete the Android setup wizard
- Select your language and region.
- Connect to your home Wi-Fi.
- Sign in to your Google account.
- Skip device restore unless you’re migrating data.
- Choose the AOSP launcher
- When prompted, select AOSP (Android Open Source Project) instead of the Odin Launcher.
- AOSP is cleaner for initial setup and better for first-time users.
- You can switch to the Odin Launcher later.
- Reboot the device once
- After setup, perform a quick restart.
- Verify Odin Settings menu is available
- Navigate to Settings > System > Odin Settings.
- If not visible, reboot the device again.
- Check for system updates
- Go to Settings > System > FOTA Update.
- Tap Check Version and install any available updates.
- Update Google Play Store apps
- Open the Play Store.
- Go to My apps & games > Update all.
Pro Tip: These early steps ensure smoother gameplay, better battery life, and fewer bugs down the line.
System Settings to Tweak ASAP
Now that your Odin 2 is up and running, it’s time to optimize your system settings for the best possible gaming, emulation, and streaming experience. These tweaks will improve performance, prevent interruptions, and help you get the most out of your device from day one.
Check for Software Updates
- Navigate to: Settings > System > FOTA Update
- Tap Check Version and install any available updates
- Keeping your firmware up-to-date ensures better stability and compatibility with emulators and games.
Increase Screen Timeout
- Go to: Settings > Display > Screen timeout
- Set to 30 minutes or higher to prevent annoying auto-sleeps during long play sessions.
Turn On Do Not Disturb Mode
- Swipe down to open the Quick Settings panel
- Enable Do Not Disturb to block notifications and interruptions during gameplay.
Disable Lock Screen Swiping
- Head to: Settings > Security
- Disable the screen swipe requirement to wake your device instantly—great for fast game access.
Set Performance Mode & Fan Mode
- Open the Quick Settings menu (swipe down from the top of the screen)
- Set Performance Mode to High for demanding emulators (like PS2 or Switch)
- Set Fan Mode to Smart so it auto-adjusts based on load—best balance between cooling and noise.
Customize Ambient LEDs & Floating Icon (Optional)
- In the Quick Settings panel:
- Enable or disable ambient LEDs based on your aesthetic preference.
- Remove the Floating Icon (sidebar) if you find it distracting during gameplay.
Pro Tip: You can always revert these settings later—this is all about dialing in what works best for you.
Navigating the Odin UI
The AYN Odin 2 runs on Android 13, so if you’ve used an Android phone or tablet before, you’ll feel right at home. But the Odin also includes some powerful handheld-specific tools you’ll want to master early on.
Swipe down from the top of the screen to open the Quick Settings panel, where you can:
- Toggle Performance Modes
- Choose between Standard, Performance, and High Performance depending on your emulation needs.
- For demanding systems like PS2 or Switch, stick with High Performance.
- Adjust Fan Speed
- Set the Fan Mode to:
- Quiet for light retro games
- Smart for automatic control based on CPU/GPU load
- Turbo if you’re running intense games and need max cooling
- Set the Fan Mode to:
- Control Ambient LED Lighting
- Customize the look of your device with LED toggles—great for nighttime or docked play.
- Enable or Disable Floating Icon
- The white bar on the right side of your screen can be hidden if you find it intrusive.
Side Bar – In-Game Tools & Enhancements
Swipe inward from the right edge of the screen while in a game or emulator to reveal the Floating Icon side menu, which includes:
- Button Mapping Tool
- Perfect for touchscreen games or games that don’t natively support controllers.
- FPS & Temperature Monitoring
- Keep an eye on your performance in real-time.
- Access to AYN Guide
- A helpful built-in manual with Odin-specific tips and documentation.
- Quick Access Toggles
- Adjust screen brightness, enable screen recording, monitor resource usage, and more.
Pro Tip: Once you’ve nailed the Quick Menu and Side Bar, you’re in full control of your Odin 2—no more digging through confusing menus mid-game.
Best Apps to Install Immediately
So your AYN Odin 2 is booted up, connected to Wi-Fi, and ready to rumble. Now what? It’s time to deck it out with the best apps to transform your handheld into a retro powerhouse.
Gamepad Mapping Utilities
Want to remap buttons, fine-tune dead zones, or swap between control layouts?
- Game Controller KeyMapper – Tweak everything down to the stick sensitivity.
- Mantis Gamepad Pro – Especially useful for mapping touchscreen-only Android games.
- ReWASD (Windows only) – If you’re configuring from a PC first, this can prep profiles.
Perfect if you’re jumping between Android games and emulators.
Optional But Awesome
Want to stretch the Odin 2 beyond retro gaming? These apps unlock streaming, cloud saves, and multimedia:
- Moonlight – Stream PC games over your network using NVIDIA Gamestream.
- Steam Link – Stream your Steam library right to the handheld.
- RetroArch – Still a strong all-in-one emulator if you like a unified experience.
- Solid Explorer – A must-have for file management.
- VLC or MX Player – Watch videos like it’s a tiny media center.
- Dropbox / Google Drive – Sync save files across devices.
How to Add Games to Your AYN Odin 2 (Step-by-Step)
Now it’s time for the real fun—loading up your game library. Whether you’re a ROM hoarder or just want to play Teenage Mutant Ninja Turtles: Turtles in Time and call it a day, this guide walks you through the process cleanly.
Tools You’ll Need
To get started, make sure you’ve got the basics:
- A quality microSD card (128GB+ recommended)
- A microSD to USB adapter or a device with a built-in SD reader
- A computer (Windows, macOS, Linux all work fine)
- Your legally obtained ROMs and BIOS files 😉
Folder Structure: Keep It Clean
A well-organized ROM folder makes everything easier—especially when you start using frontends like ES-DE or Daijisho.
Here’s the standard structure:
📁/ROMS/

    📁/NES/

    📁/SNES/

    📁/GBA/

    📁/PS1/

    📁/Dreamcast/

    📁/BIOS/
Tips for Smooth Sailing:
- Use clear folder names (not “random stuff” or “games2”)
- Keep BIOS files separate in a /BIOS/ folder
- Rename games for clarity: Ape_Escape_USA.bin > Ape Escape (USA).bin
- For multi-disc games (PS1): Use .m3u playlist files or label clearly (Disc 1, Disc 2, etc.)
Transferring Files
When transferring files, you’ve got two solid options:
USB Transfer (Plug & Play)
- Plug your Pocket 5 into your computer via USB-C
- Tap File Transfer Mode on your Pocket 5 screen
- Your internal storage + SD card will show up on your computer
- Drag and drop your ROMs into the appropriate folders
- Safely eject the device
SD Card Transfer (Faster for Big Files)
- Remove the SD card from your device
- Insert it into a card reader connected to your PC
- Open the “ROMS” directory (or create one if needed)
- Drop in games and BIOS files as outlined above
- Reinsert into your Pocket 5
Pro Tip: Using an SD card reader is generally faster—especially for transferring large PS1 or GameCube ROMs.
Organizing for Frontends
Frontends like Daijisho, ES-DE, or LaunchBox rely on clean structure and naming. Here’s how to stay frontend-friendly:
- Each system should have its own folder
- Use the No-Intro ROM naming convention for best results with scraping
- Keep BIOS files in a dedicated folder and set the path in your emulator settings
- Want pretty box art? Tools like Skraper or Daijisho’s built-in scraper can auto-download metadata and visuals
TL;DR 🥱
- Create folders: /ROMS/NES, /ROMS/PS1, /ROMS/BIOS, etc.
- Use a microSD card + card reader (or USB transfer)
- Name your games clearly
- Keep BIOS separate
- Test your emulator paths + game launches
- Prepare for scraping if you want cover art and info
Frontends Deep Dive: Make Your Library Shine
The AYN Odin 2 is a powerful emulation beast—but let’s be honest: the stock launcher is… fine. Functional? Sure. Exciting? Not quite. If you want your game library to look like a sleek digital museum instead of a basic file list, it’s time to level up with a proper frontend.
Why Change the Stock Launcher?

Odin 2’s stock UI has improved over the years, and it’s decent for jumping into recent games quickly. But it’s not built for deep collections or seamless navigation across dozens of systems. No metadata scraping, no box art, no slick transitions. Just a utilitarian launcher.

If you’re planning to load your Odin 2 with hundreds of games? You need a frontend.
Top Frontends for Android: Pros & Cons
LaunchBox – The Heavy Hitter
- Pros:
- Ultra customizable
- Gorgeous animations and transitions
- Full metadata scraping (box art, logos, trailers)
- Deep emulator config options
- Cons:
- Paid (after free trial)
- Can be overkill for casual users
- Heavier on system resources
Best for: Power users with big libraries and OCD for aesthetics.
Daijisho – The Minimalist’s Dream
- Pros:
- Clean, modern interface
- Free and lightweight
- Smooth performance, even with massive libraries
- Built-in scraper for box art and metadata
- Cons:
- Limited customization (but improving)
- Occasional quirk with system sorting
Best for: Casual users who want a beautiful but simple experience.
ES-DE (EmulationStation-Desktop Edition) – Retro Arcade Vibes
- Pros:
- Familiar look for EmulationStation fans
- Retro-feeling themes with lots of flair
- Great performance on Android
- Big community support
- Cons:
- Slight learning curve for setup
- Metadata scraping requires manual setup or a helper tool
Best for: Arcade heads and EmulationStation veterans.
Importing Metadata & Box Art
Once your frontend is chosen, it’s time to pretty things up:
How to Add Box Art Automatically
- Daijisho / LaunchBox: Built-in scraper. Just scan your ROM directories and let the frontend work its magic.
- ES-DE: Use Skraper on your PC to build your game folders with metadata and art, then transfer them to your Pocket 5.
Metadata Tips:
- Name your ROMs clearly (no “ROM (USA) [v1.1]” garbage)
- Organize games by system in subfolders:
/ROMS/NES, /ROMS/SNES, /ROMS/GBA, etc. - Keep BIOS files in a central /BIOS folder for smoother compatibility
TL;DR 🥱
| Frontend | Best For | Key Strength |
| LaunchBox | Power users | Deep customization |
| Daijisho | Minimalists & newcomers | Sleek & simple UI |
| ES-DE | Retro arcade fans | Thematic nostalgia |
No matter which frontend you roll with, one thing’s for sure: once you fire it up and see your retro library come to life with gorgeous box art and crisp menus, you’ll never want to go back to plain folders again.
Recommended Settings & Performance Profiles
To get the most stable gameplay, smooth frame rates, and longer sessions on your AYN Odin 2, these are the essential system settings and performance tweaks you should apply right away.
Performance Mode
- Set to: Performance or High Performance
- When to use:
- Performance: Good for most 2D and retro systems.
- High Performance: Best for demanding emulators like PS2 (AetherSX2), GameCube/Wii (Dolphin), or Nintendo Switch (Skyline/Yuzu).
- Where: Swipe down → Quick Settings → Performance Mode.
Fan Mode
- Set to:
- Quiet: Ideal for casual retro gaming or streaming.
- Smart: Automatically adjusts fan speed for better cooling under heavy load (GC/Wii/PS2/Switch).
- Pro Tip: Smart mode balances thermals and battery well.
Floating Icon (Sidebar)
- Disable if it’s distracting:
- Go to Settings > Odin Settings > Sidebar
- Turn off or customize visibility
- Useful for quick in-game tools, but can obstruct some UI elements.
Screen Timeout
- Suggested setting: 30 minutes
- Prevents screen from turning off during long play sessions or when leaving the device idle momentarily.
Notification Management
- Turn on Do Not Disturb Mode:
- Go to Settings > Sound > Do Not Disturb
- Prevents interruptions from calls, notifications, or system alerts during gameplay.
Keeping Things Updated (Without the Headache)
One of the most underrated parts of maintaining a smooth and frustration-free experience on the AYN Odin 2? Staying updated. Whether it’s your apps, frontends, or even the system firmware, keeping things current ensures better performance, fewer bugs, and access to the latest features.
But Android updates can get chaotic—especially when your favorite apps aren’t on the Play Store. Let’s make it painless.
Updating Apps Installed via Obtainium
If you’re using Obtainium (and you absolutely should be), updates become almost automatic.
Here’s how to stay on top of it:
- Open Obtainium.
- Tap the “Check for Updates” button at the top.
- Apps with new versions will appear in a list.
- Tap Update All or pick and choose which ones to install.
Pro tip: Turn on notifications for updates inside Obtainium settings to never miss a patch.
Firmware Updates
OTA Updates
- Occasionally available for minor tweaks or bug fixes.
- Check Settings > About Device > System Update.
- If nothing’s there, don’t sweat it—it’s normal.
Manual Firmware Updates
- Go to the official AYN firmware page.
- Download the latest firmware for the Pocket 5.
- Follow AYN’s flashing instructions carefully (usually via SD card or USB-OTG).
- Backup your data before flashing—it will wipe your device.
TL;DR 🥱
| Task | Tool | Quick Tip |
| App updates | Obtainium | Use “Check for Updates” weekly |
| Firmware updates | AYN site | Always back up before flashing |
| Update control | Android Settings | Disable auto-updates for critical apps |
FAQ
Even the sleekest handheld setup hits a few snags. Whether it’s a game that won’t boot or a mysteriously vanishing title, don’t sweat it—we’ve got quick fixes for the most common issues that pop up on the AYN Odin 2. Bookmark this section. You’ll thank yourself later.
If a game just refuses to start—especially for systems like PS1, Sega CD, or Dreamcast—chances are you’re missing essential BIOS files.
- Make sure you’ve created a /BIOS folder either in internal storage or on your SD card.
- Drop the required BIOS files inside.
- Double-check the naming—emulators often expect specific file names (e.g., scph1001.bin for PS1).
That frame rate drop in Chrono Trigger or scratchy audio in Metal Slug isn’t a death sentence—it’s probably just a finicky emulator core.
- Open your frontend (like Daijisho or ES-DE).
- Edit the emulator assigned to the problem system.
- Try a lighter or more optimized core (e.g., Beetle PSX HW for PlayStation, gpSP for GBA, Flycast for Dreamcast).
You know you loaded Super Mario World on the SD card… so where is it?
- Go into your frontend’s settings and rescrape metadata for that system.
- Make sure the ROM file is named cleanly (e.g., no brackets, dashes, or region tags).
- Consider editing the game title manually if scraping doesn’t help.
128GB fills up fast when you’re rolling with PS2 and GameCube ROMs. If you notice performance drops or Android alerts about low space, it’s time to shift some weight.
- Plug your device into a PC or use a card reader.
- Move entire system folders (like ROMs/PS1, ROMs/N64) to your SD card.
- Update paths in your frontend or emulator settings.
Conclusion
After a few smart setup tweaks and essential emulator installs, your AYN Odin 2 is no longer just a handheld—it’s a full-blown retro gaming powerhouse.
Whether you’re reliving PS2 legends, smashing through GameCube classics, or exploring Nintendo Switch indie gems, the Odin 2 delivers an unmatched handheld experience in 2025.
The only question left: What will you play first?

